Understanding URL Redirects and How To Set Them Up in Squarespace
Have you ever clicked on a link only to find yourself on a completely different page than you expected? That's likely the work of a URL redirect and it's a crucial tool for maintaining a professional and user-friendly website. Whether you're rebranding your business, reorganizing your site structure, or simply updating old content, understanding URL redirects can help you keep your website running smoothly and your visitors happy. In this guide, I'll break down everything you need to know about URL redirects and show you can set them up in Squarespace.
What is a URL Redirect?
A URL redirect is like a digital forwarding address. When someone tries to visit a webpage at one URL, they're automatically sent to a different URL.
For example, imagine you have a page about your team at www.yoursite.com/our-team. Later, you decide to rename it to www.yoursite.com/about-us. Without a redirect, anyone using the old link would get a 404 error. But with a redirect in place, visitors who click on /our-team are automatically taken to /about-us, they'll end up in the right place without even realizing they used an outdated link.
There are two main types of redirects 301 and 302.
301 Redirects
These are the most common type of URL redirect and are meant for permanent changes to your website.
When to use 301 redirects:
When you change the URL of a page or blog post.
If you create a new version of a page or blog post.
When you delete an old page or blog post.
During a website migration or redesign.
302 Redirects
These are meant for temporary changes to your website.
When to use 302 redirects:
When you want to temporarily replace a page with another.
When you need to take down a page temporarily for an update.
Why Use URL Redirects?
Maintain SEO value when changing page URLs
Prevent “404 Not Found” errors
Keep external links working after site restructuring
Create shorter, cleaner URLs
Setting Up Redirects in Squarespace
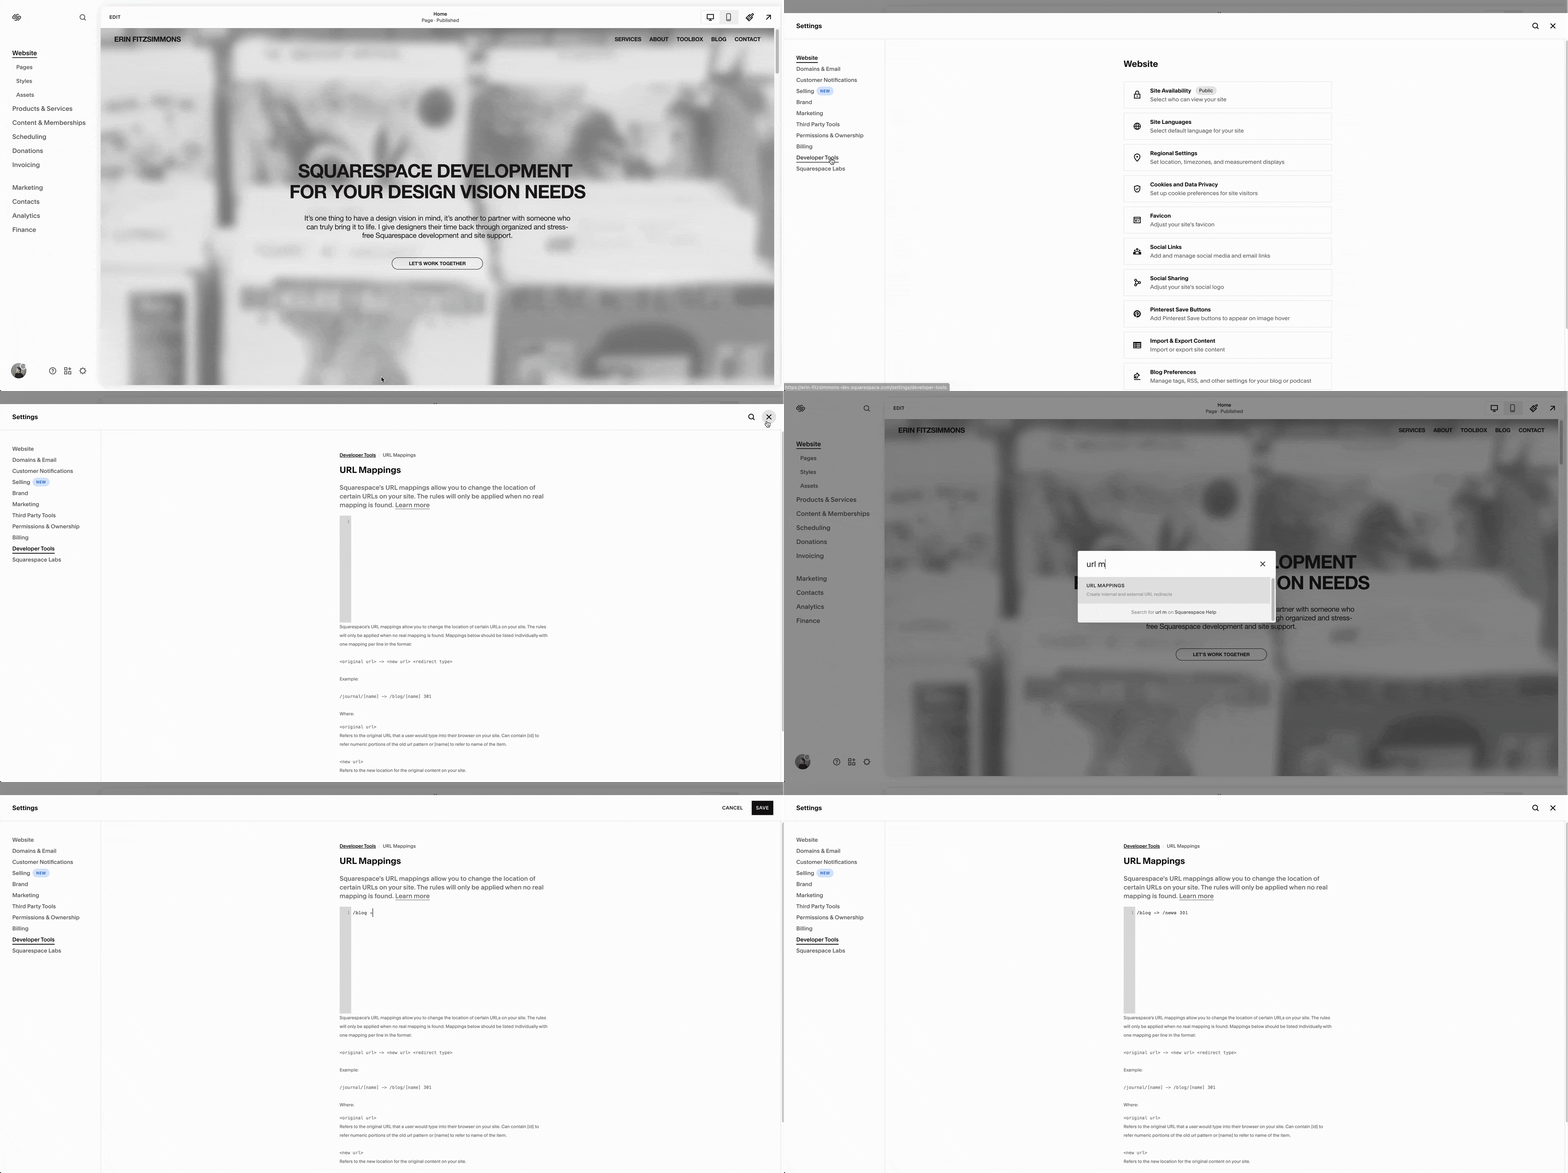
Here's how to create a URL redirect in Squarespace:
1. Go to Settings (gear icon) → Developer Tools → URL Mappings or use the search tool and search for “url mappings”
2. Click into the text box and enter the redirect in this format:
/old-url -> /new-url 301
The format has three parts: old URL, new URL, and redirect type.
For the old URL, enter what comes after your domain name's slash. For example, if your old page was www.example.com/blog, you'd enter /blog.
For the new URL, do the same thing, only include what comes after the slash. If you're redirecting to www.example.com/news, you'd enter /news.
Finally, choose your redirect type 301 or 302.
So your final redirect would look like this:
/blog -> /news 301
4. Click “Save” to apply your changes
5. Test your redirect
If you encounter a 404 Error, double-check the URL mapping formula and ensure that the original content is disabled or deleted and that the new content is active.
Best Practices
Always test your redirects after setting them up
Avoid redirect chains (redirecting to a URL that redirects again)
Update internal links to point directly to new URLs
Final Thoughts
Managing URL redirects might seem technical at first, but it's an essential skill for any website owner. By properly implementing redirects, you're not just avoiding error pages you're creating a seamless experience for your visitors and protecting your site's SEO value.
